Overview
This guide walks you through the complete CoTester workflow, from logging in and creating a project to generating, debugging, executing, and analyzing AI-powered test cases. By the end of this guide, you will be able to create and run your first automated test using CoTester.
Prerequisites
Active TestGrid account with CoTester access.
Supported web browser.
Application or website available for testing.
Test assets such as:
Website URL
Android APK/AAB file
iOS IPA file
Optional requirement documents, test scenarios, or user stories.
Steps
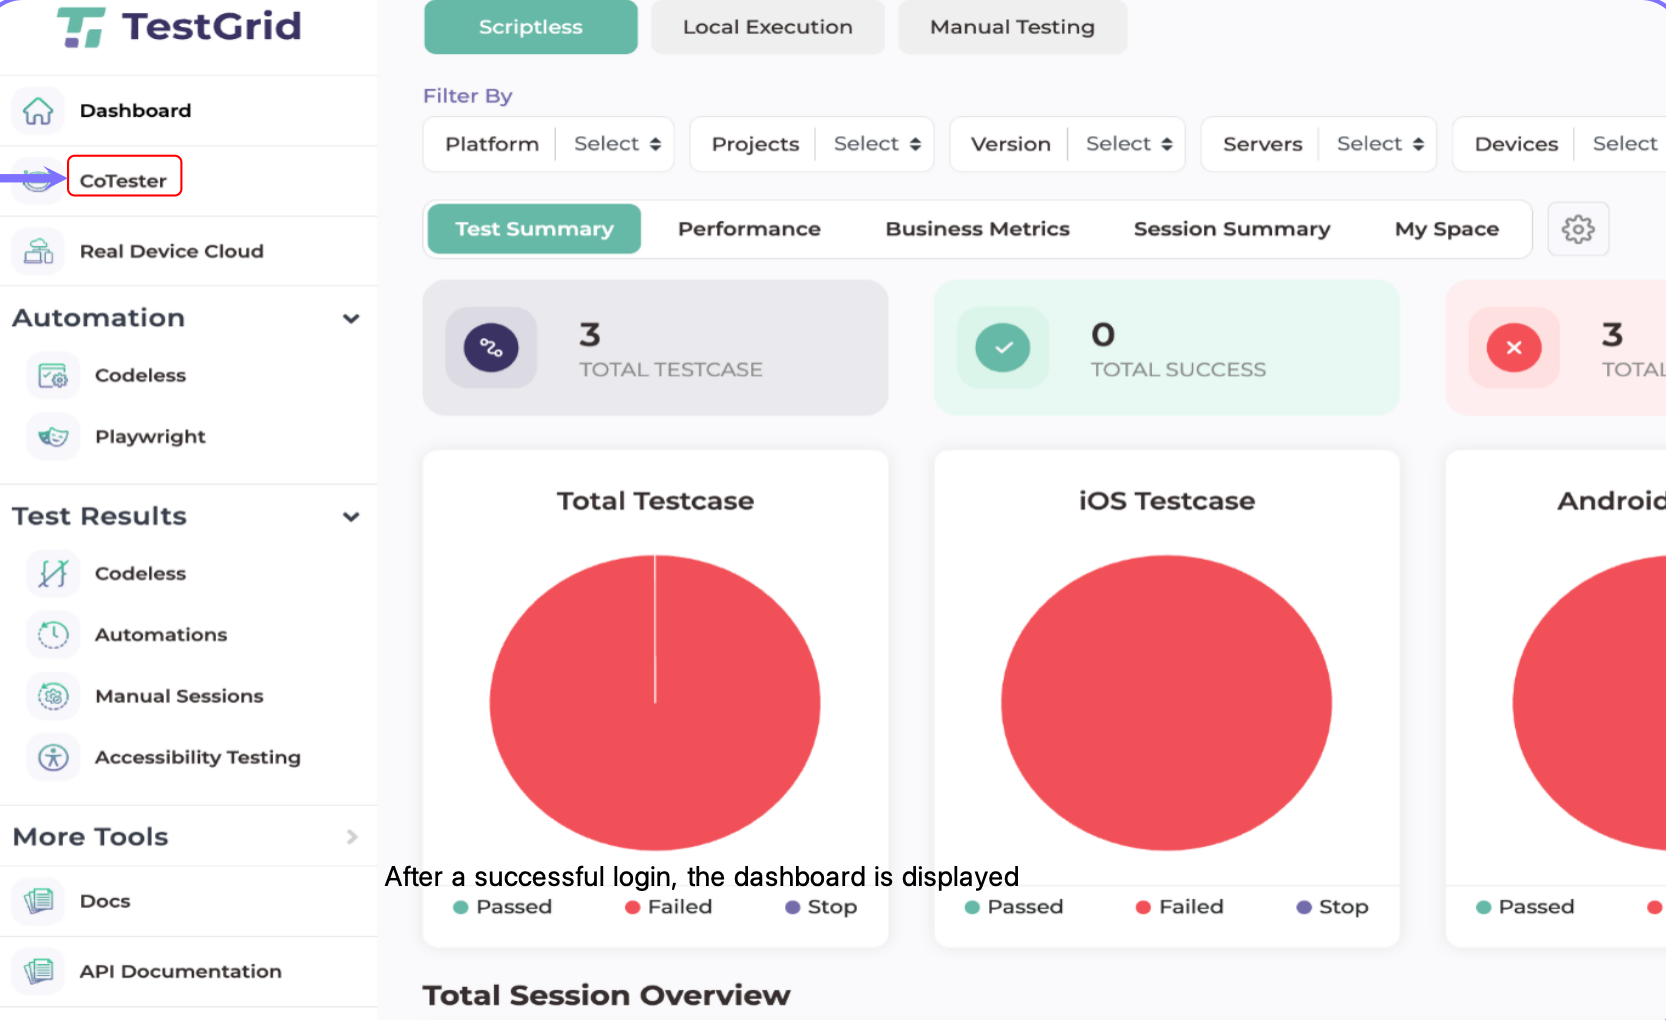
Step 1: Log in & Navigate to CoTester
Sign in using your TestGrid credentials.
After successful authentication, select the coTester option
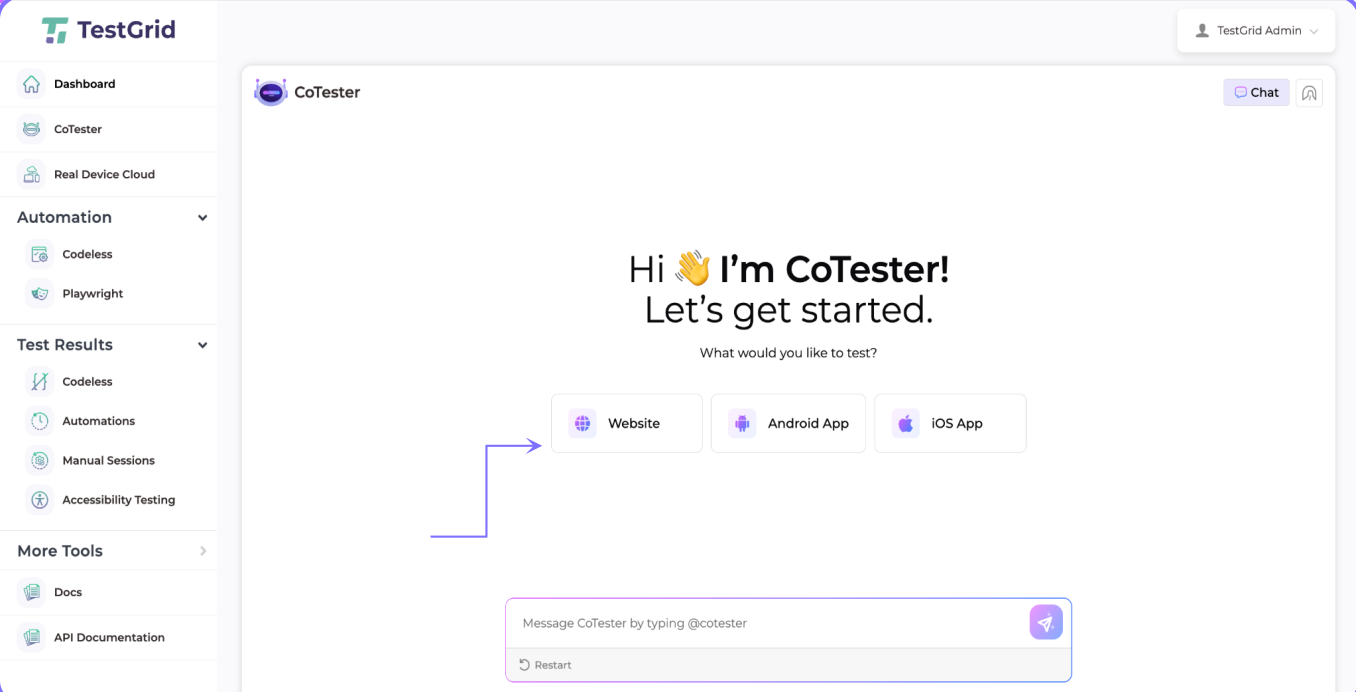
Step 2: Select the Test Platform
Choose the platform you want to test:
Website
Android Application
iOS Application
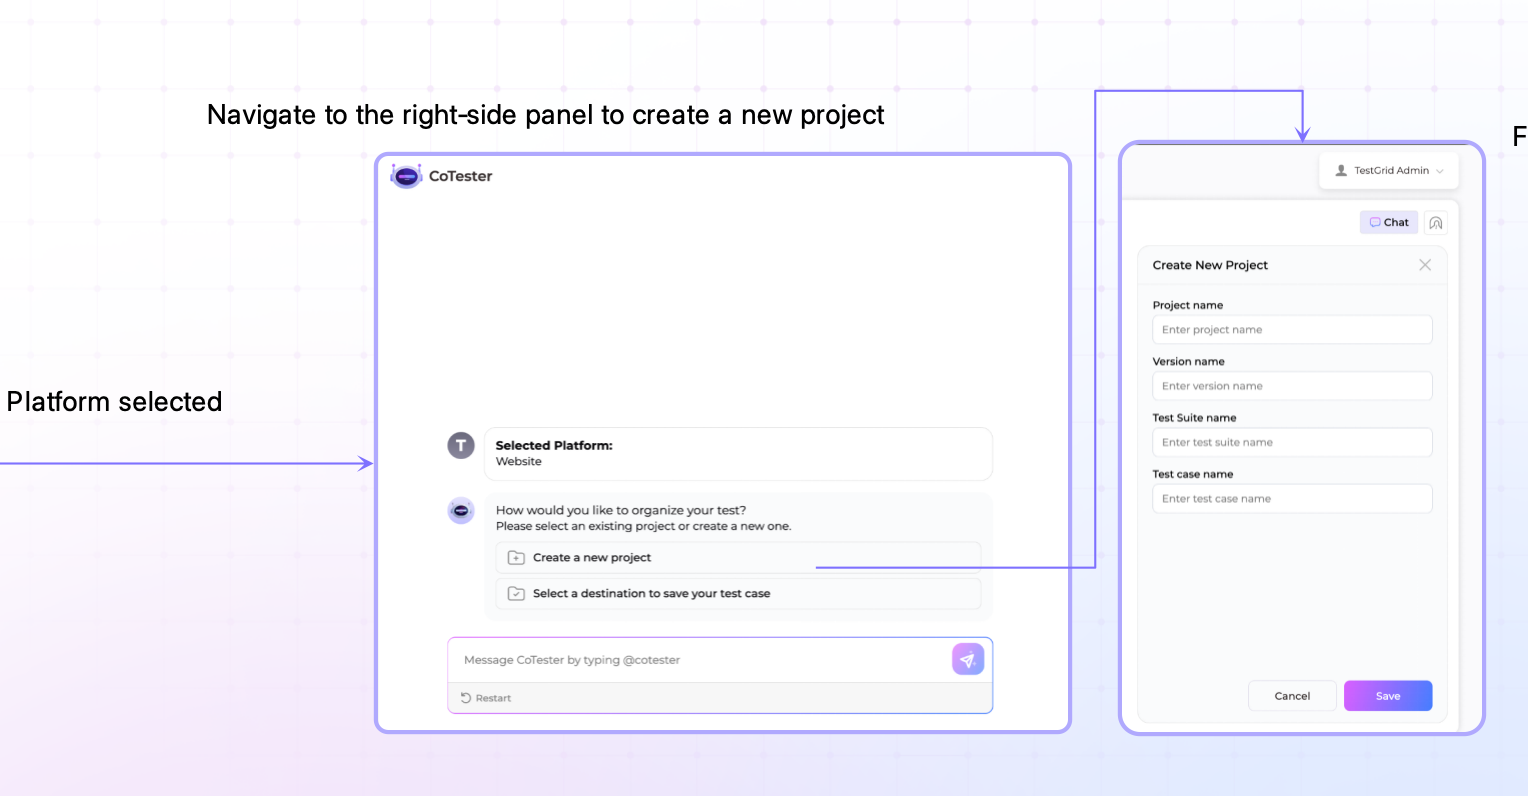
Step 3: Create a New Project
Navigate to the project creation panel and provide the required details:
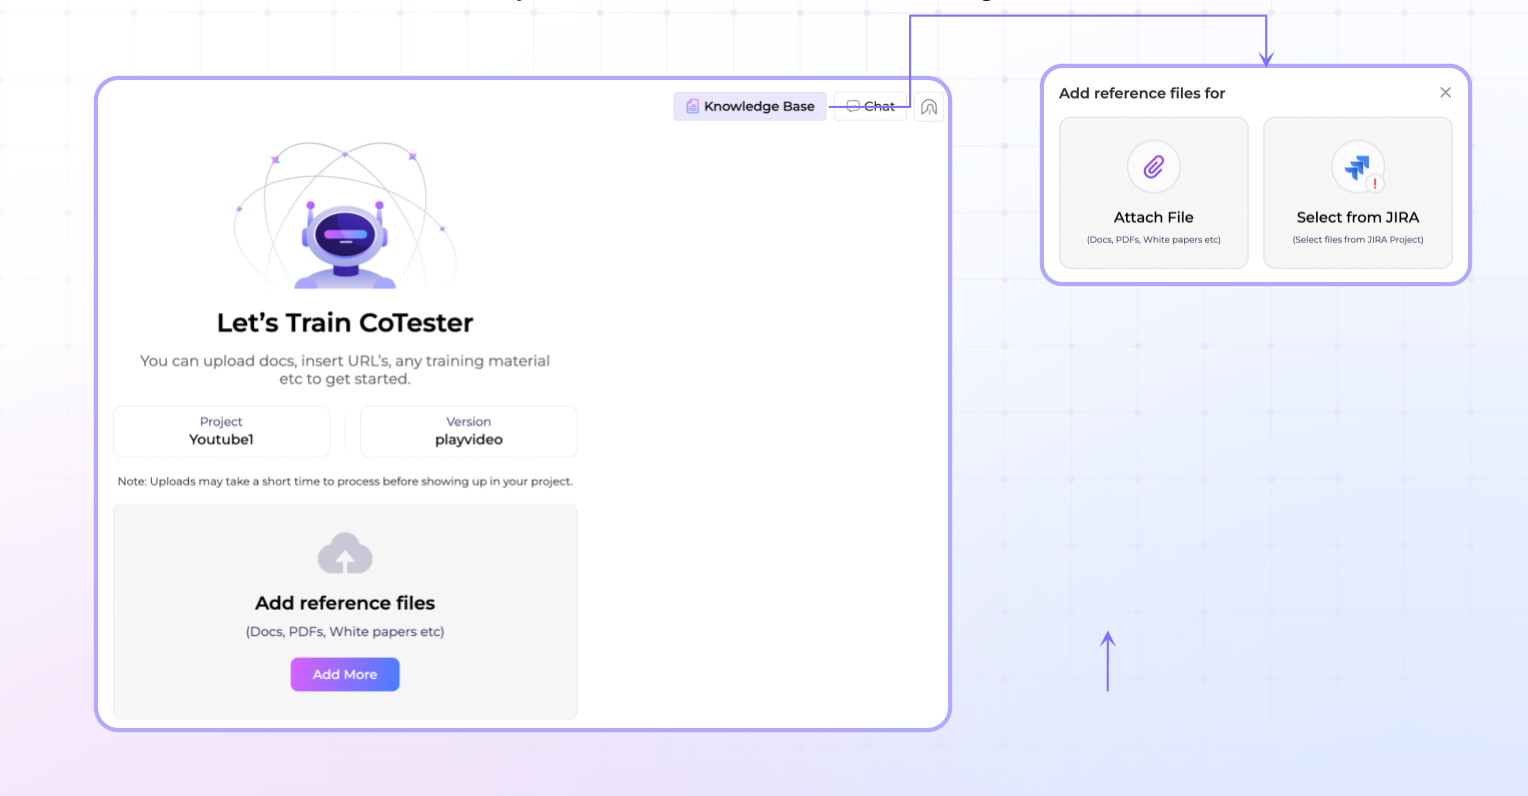
Step 4: Set Up the Knowledge Base (Optional)
If you already have requirement documents or test scenarios, add them to improve test generation accuracy.
Supported formats include:
PDF
Word Documents
Excel Files
Text Files
You may also import documents directly from Jira.
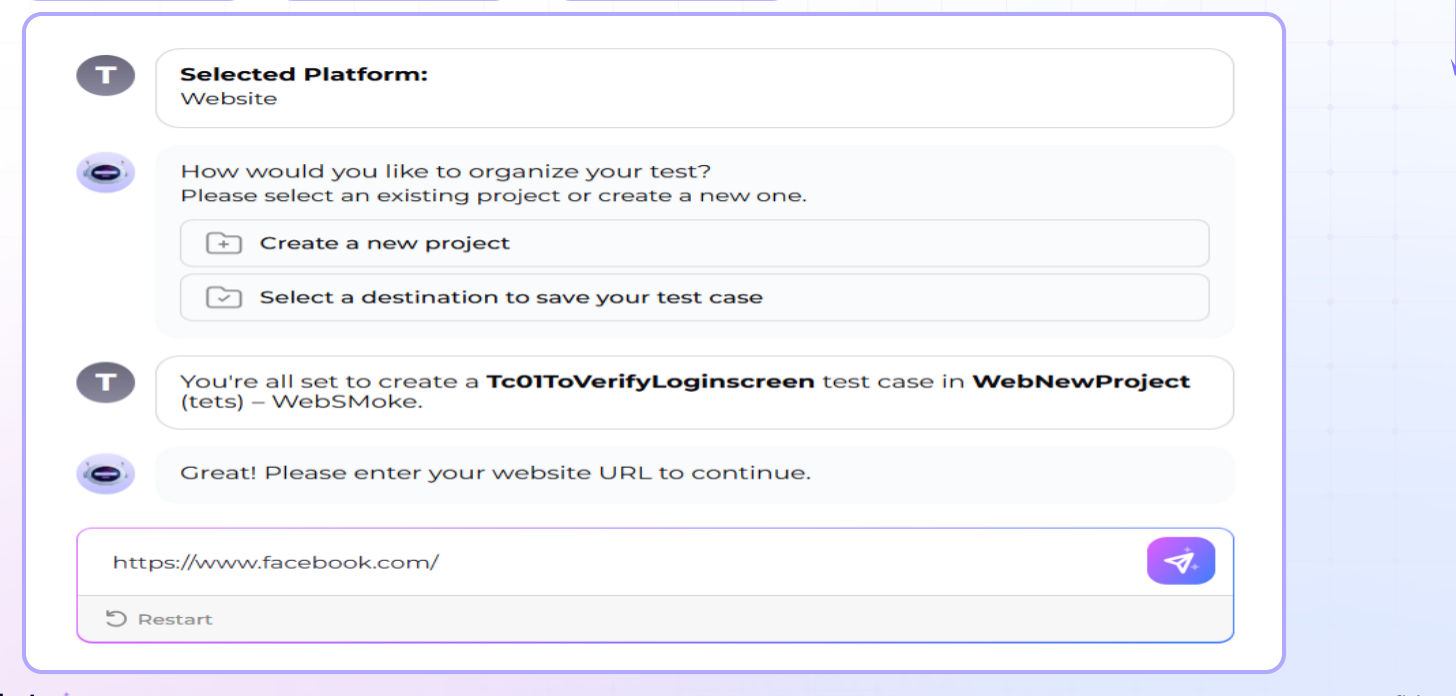
Step 5: Add the Application or Website
Provide the test target based on the selected platform:
For Websites - Enter the website URL.
For Android Apps - Upload an APK or AAB file.
For iOS Apps- Upload an IPA file.
Since i am testing website, therefore website option was selected, and URL has been entered
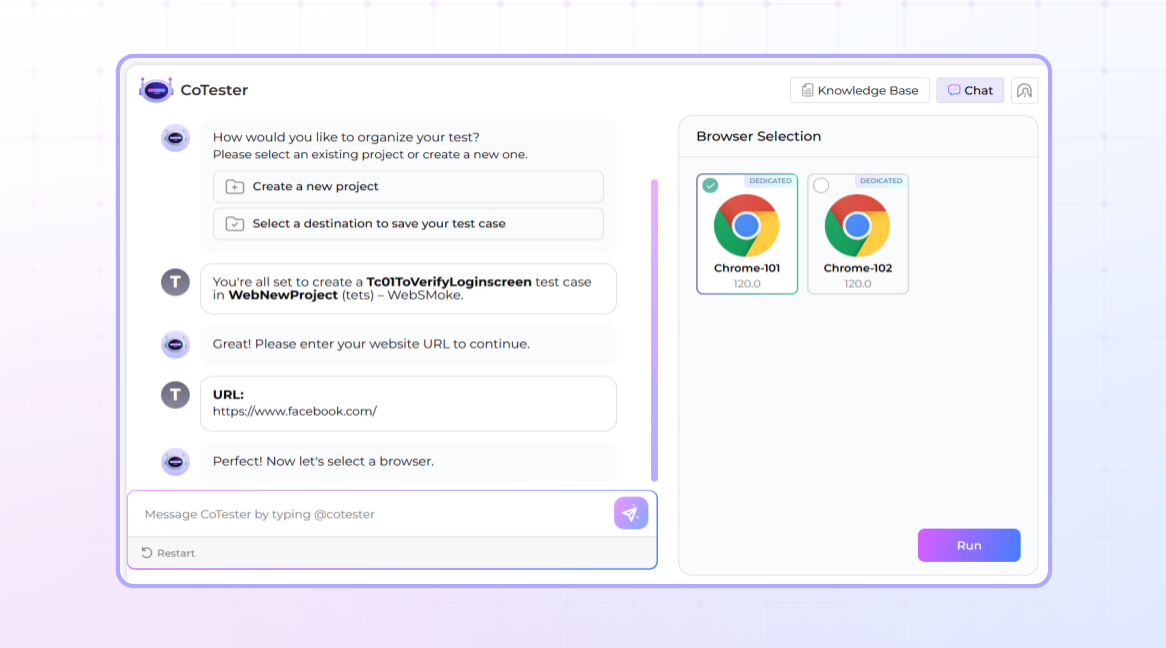
Step 6: Select a Device or Browser
Choose the desired execution environment.
Browser for web testing
Mobile device for Android or iOS testing
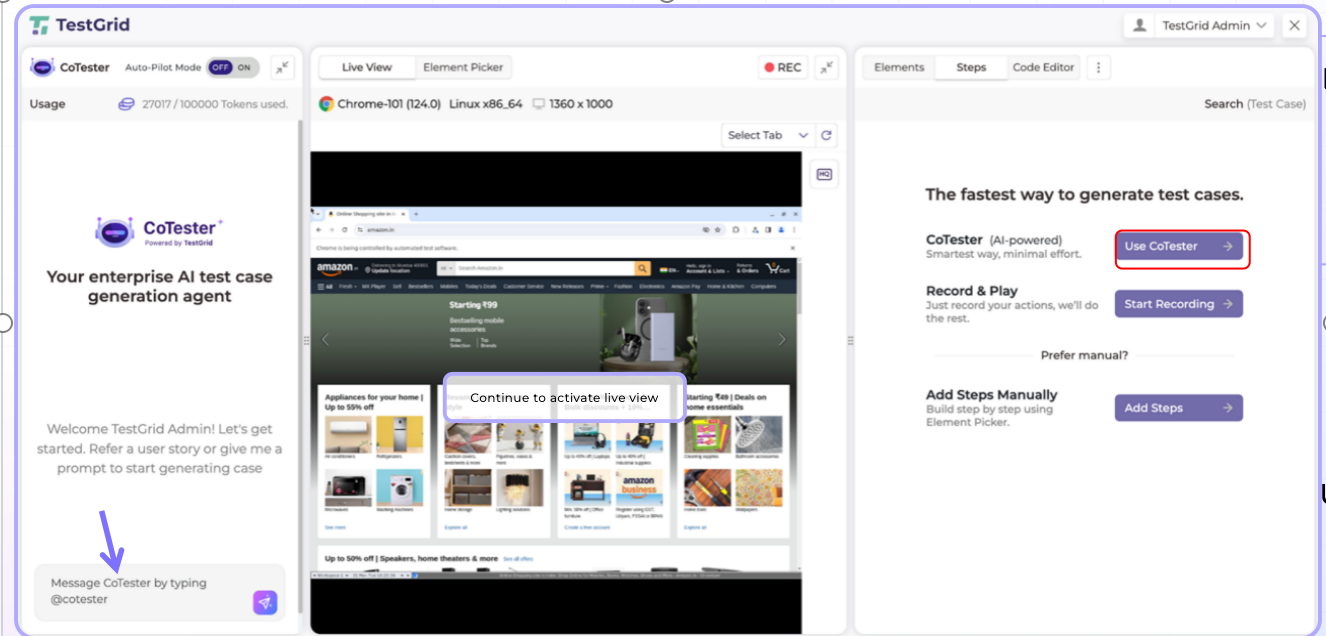
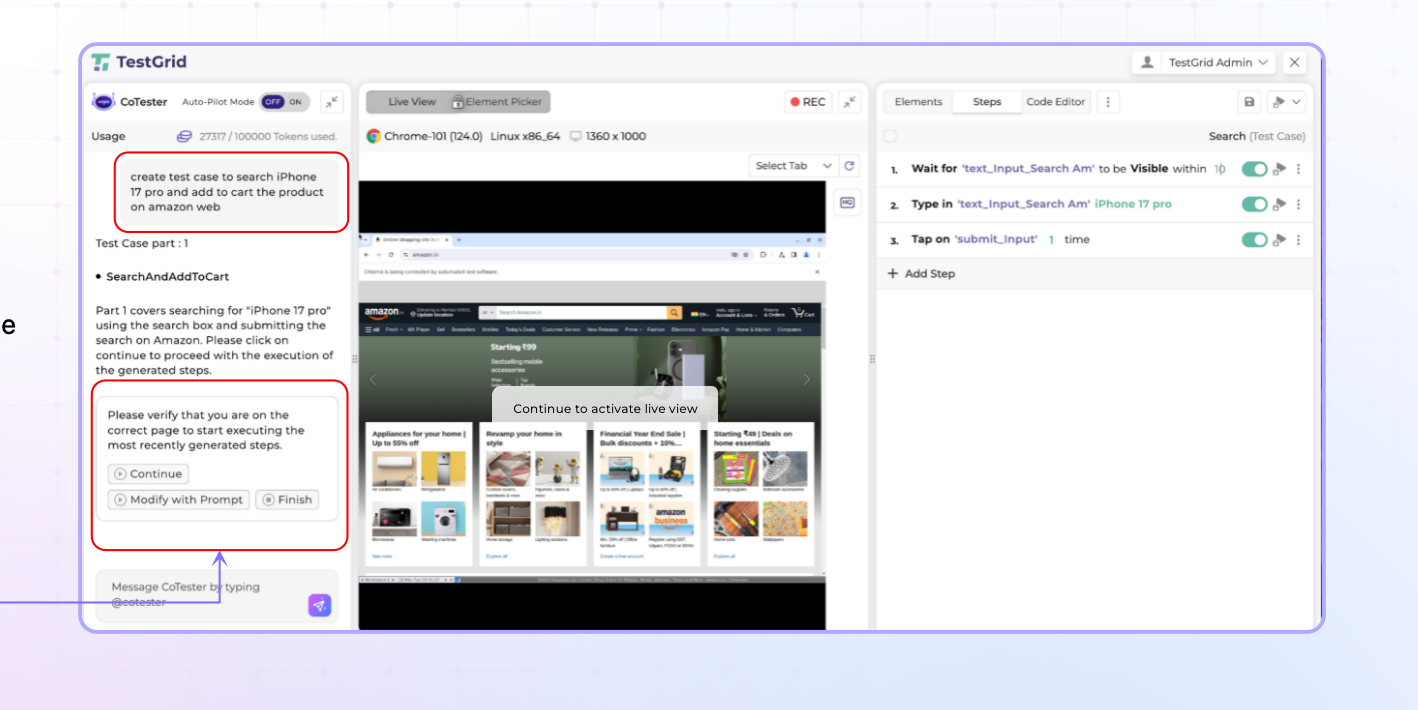
Step 7: Generate Test Cases Using AI
Select Use CoTester to begin AI-assisted test creation.
Enter your test instructions in simple, natural language.
Examples:
Verify user login functionality, by navigating to the accounts section on the top right handside
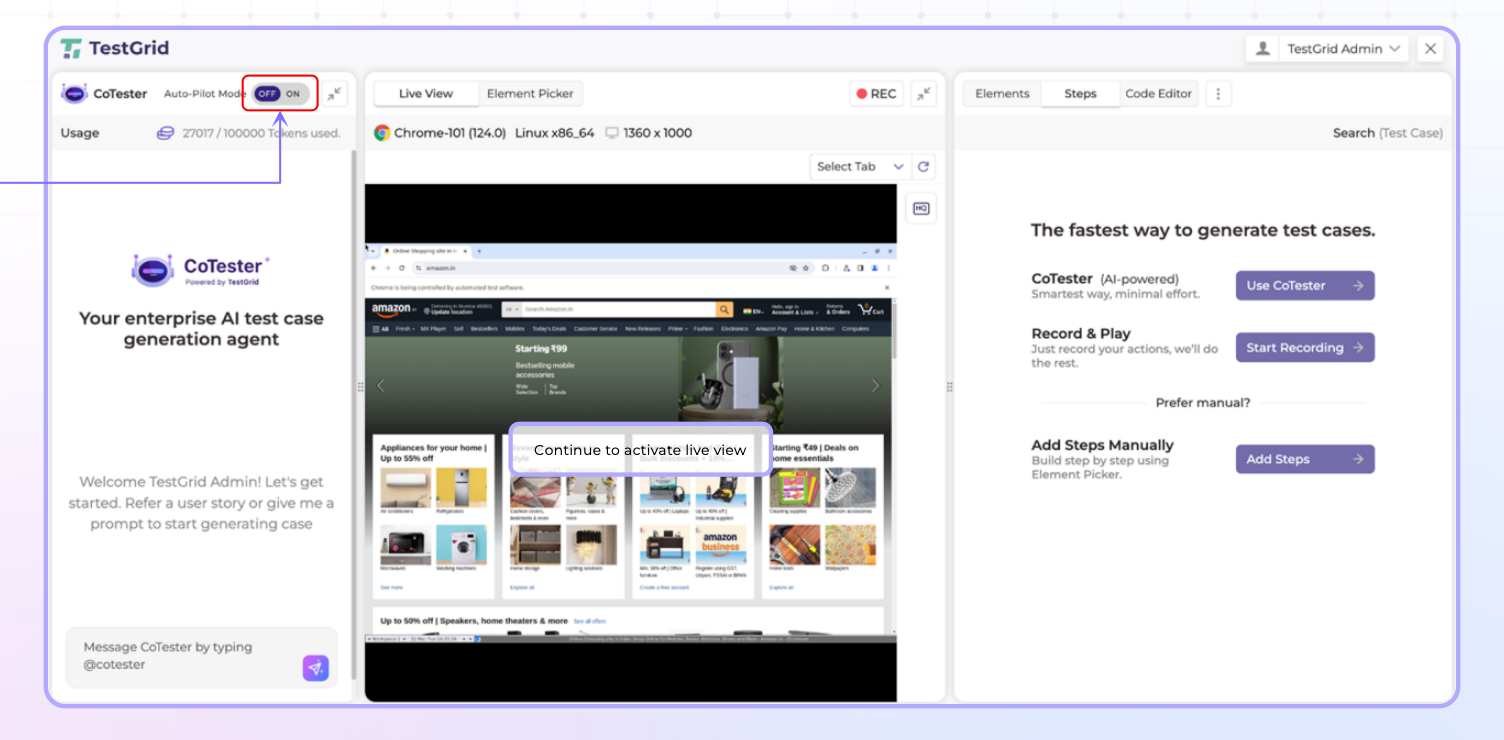
Step 8: Choose Auto-Pilot Mode
Auto-Pilot Enabled
CoTester generates the entire test case automatically.
Auto-Pilot Disabled
CoTester generates test cases incrementally, allowing review and validation at each stage.
Step 9: Review Generated Test Steps
Monitor test generation progress in real time.
Verify that generated steps align with the intended user journey.
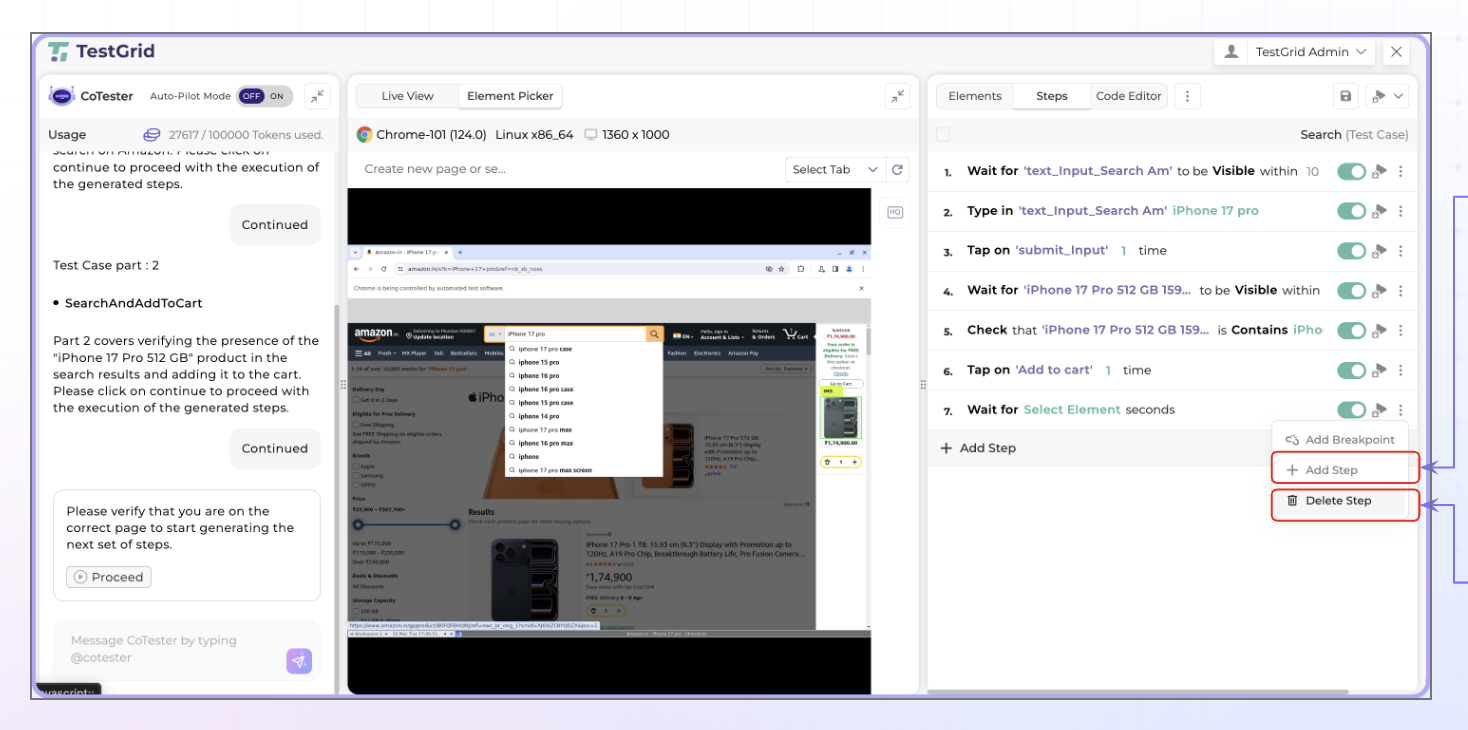
Step 10: Modify Test Steps (Optional)
You can manually refine generated tests by:
Adding new steps
Editing existing steps
Deleting unnecessary steps
Step 11: Debug the Test Case
Click Debug to validate each test step before execution.
The debugging process verifies that each action can be executed successfully.
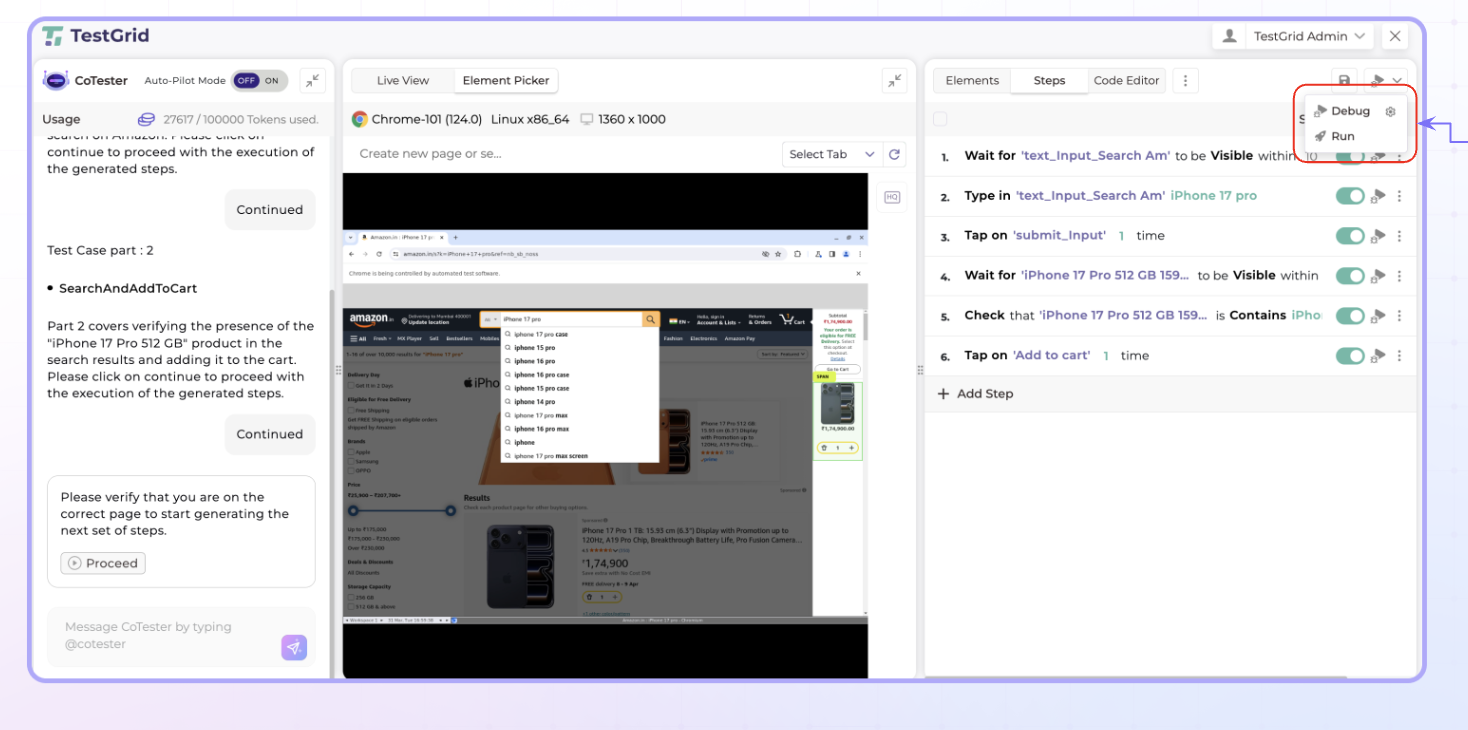
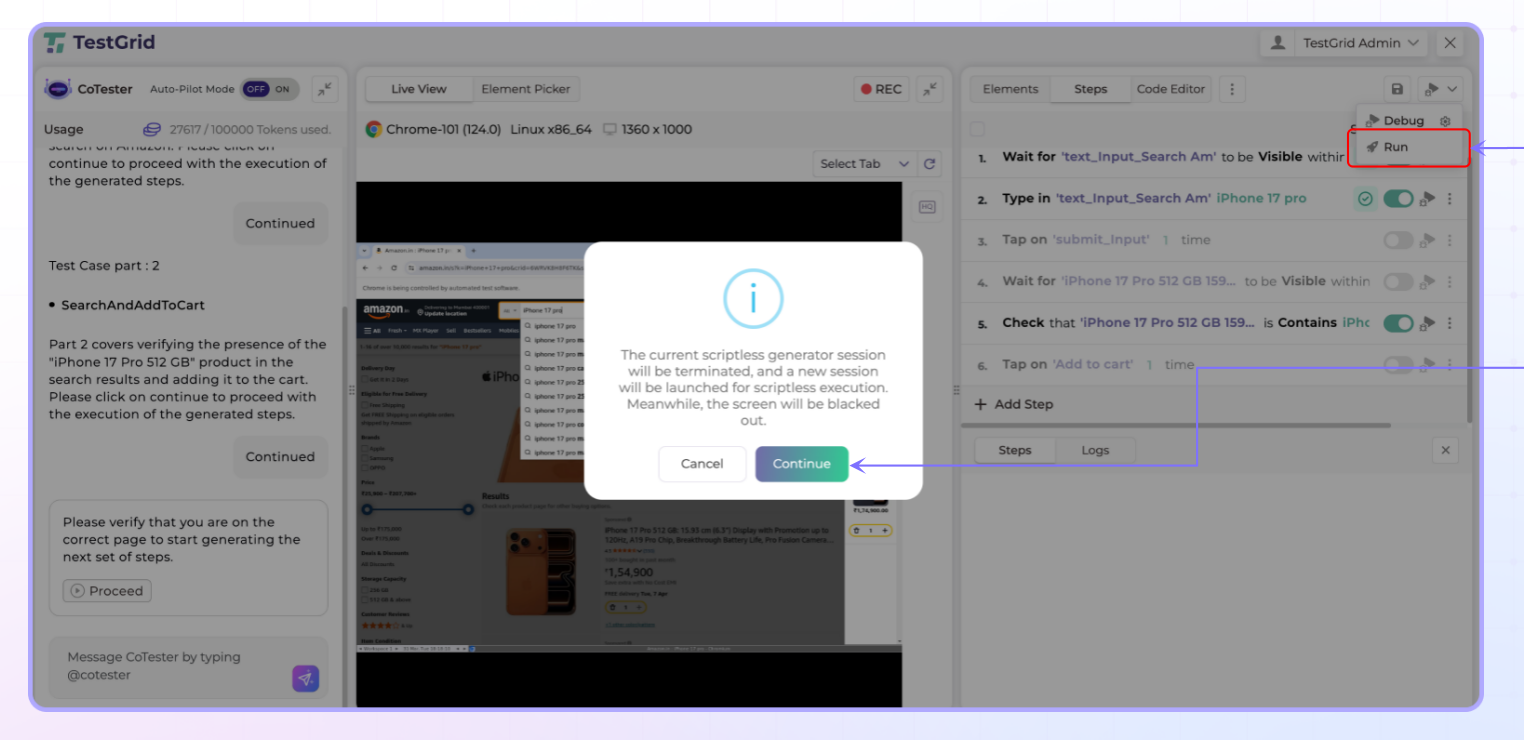
Step 12: Execute the Test Case
Once debugging is complete:
Click Run Test Case.
Select Continue.
Monitor execution in real time.
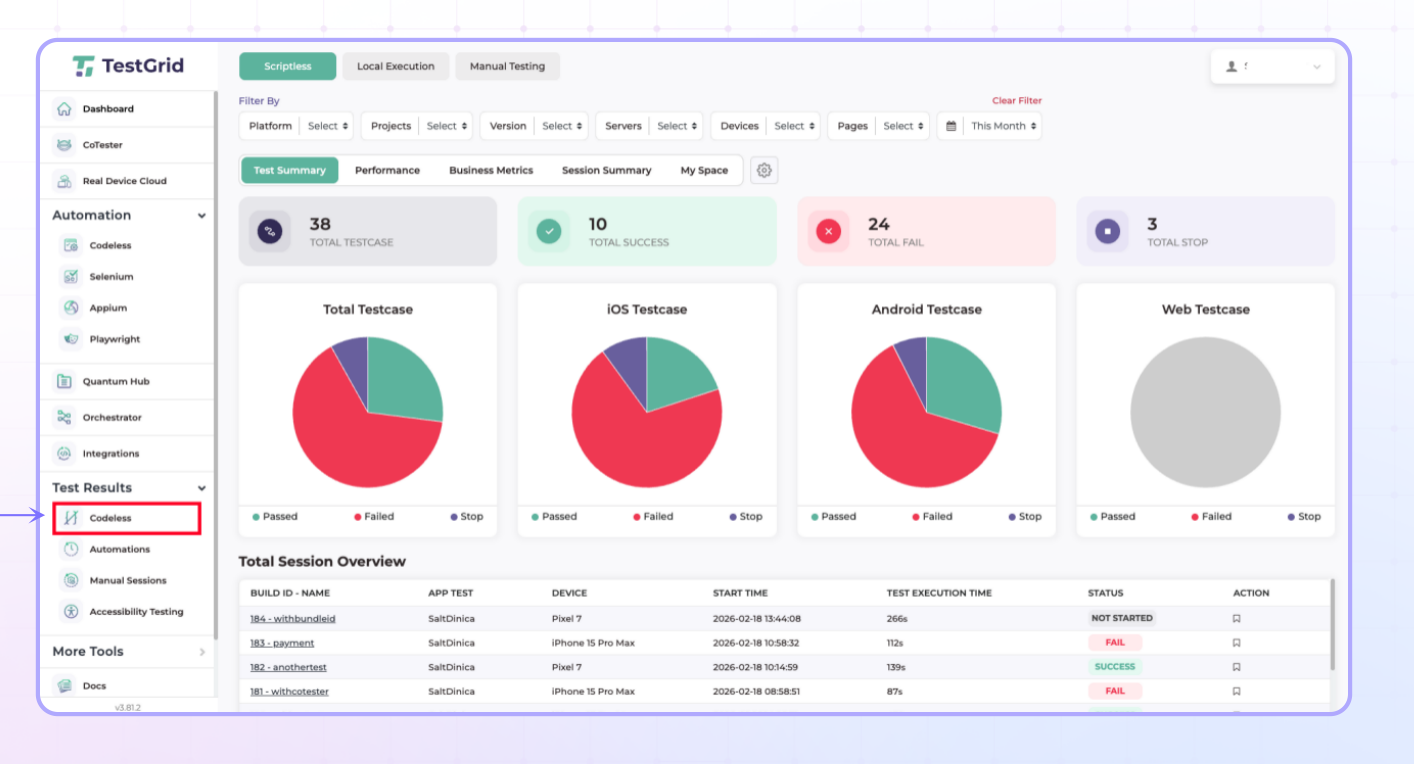
Step 13: View Test Results
Navigate to:
Test Results → Codeless
View execution history and generated reports.
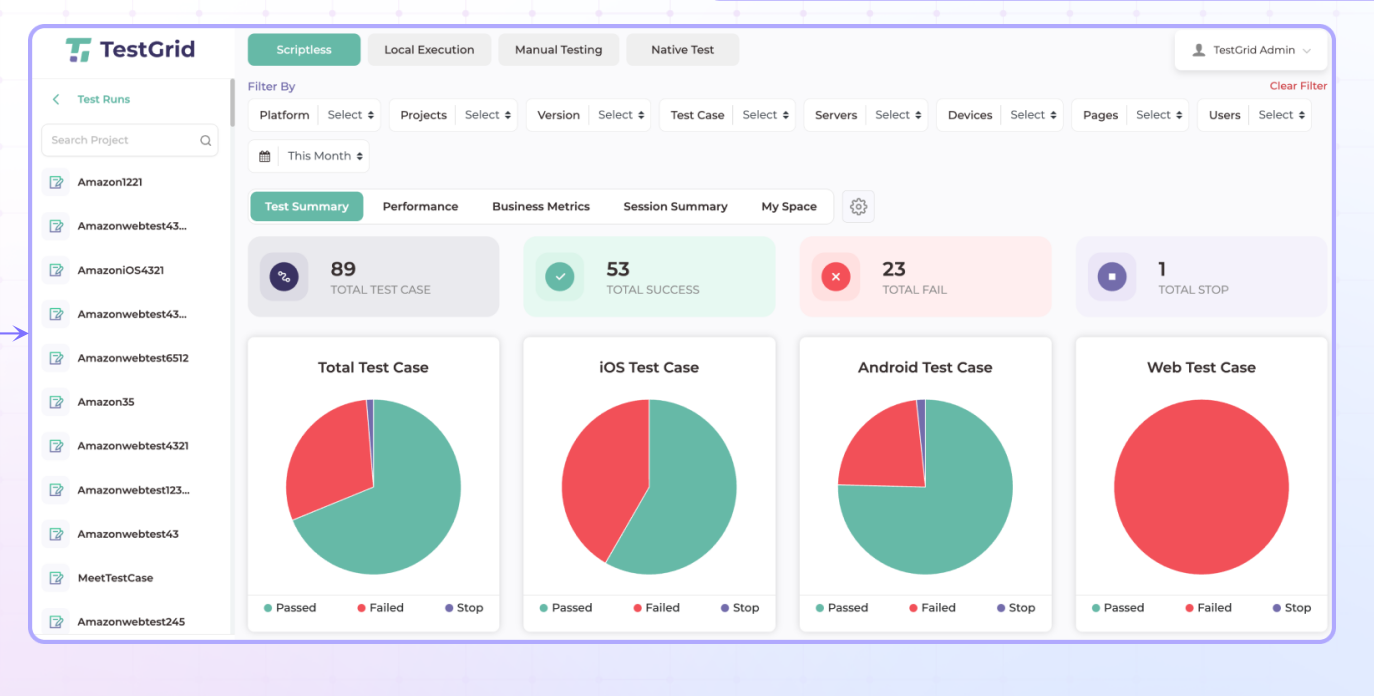
Step 14: Open Project Results
Select the required project from the left navigation panel.
Open the latest test execution for detailed analysis.
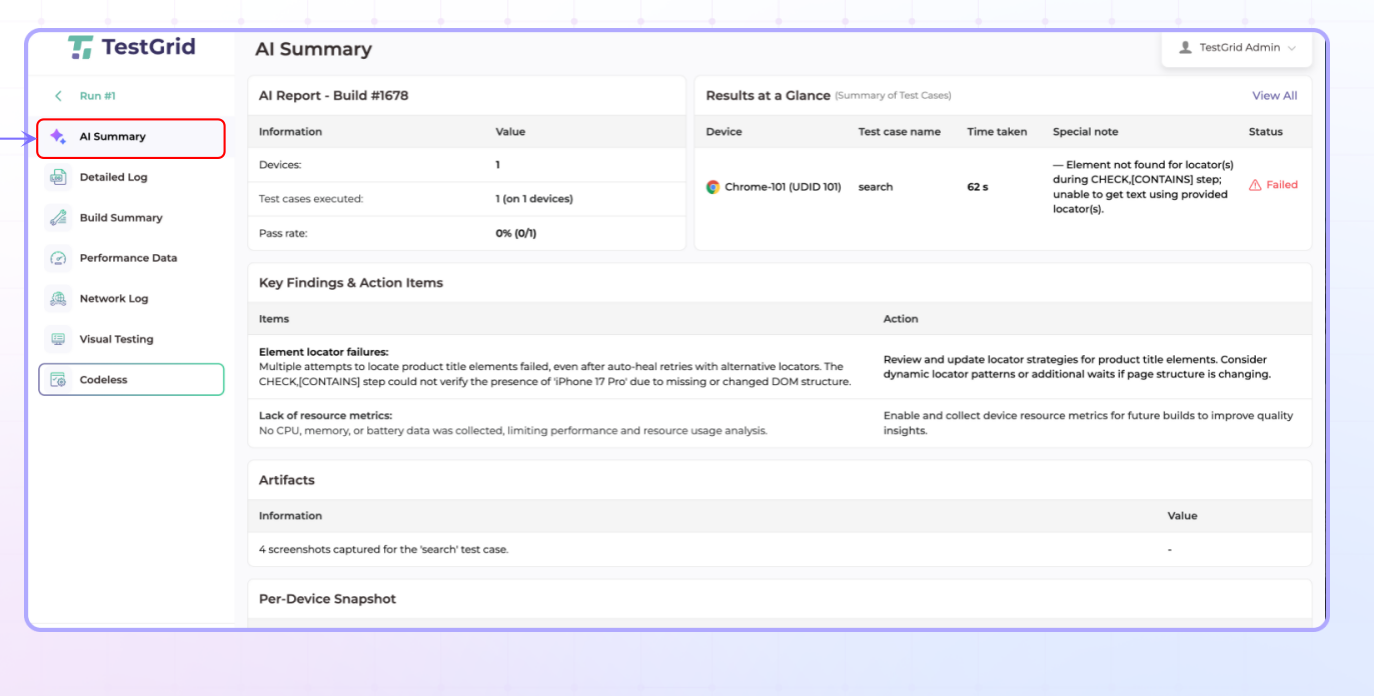
Step 15: Review AI Summary
Open the AI Summary section to view an automatically generated analysis of the test run.
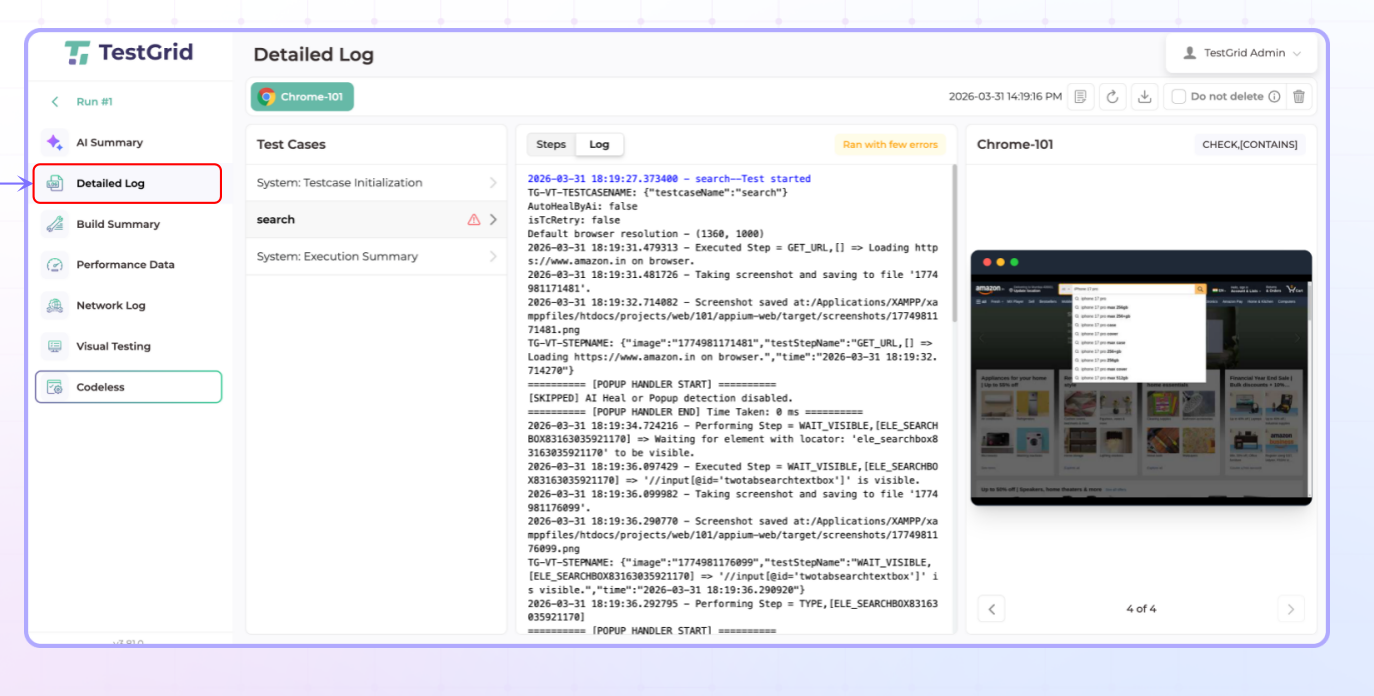
Step 16: Review Detailed Logs
Open Detailed Logs to inspect:
Executed steps
Validation results
Errors and failures
Execution logs
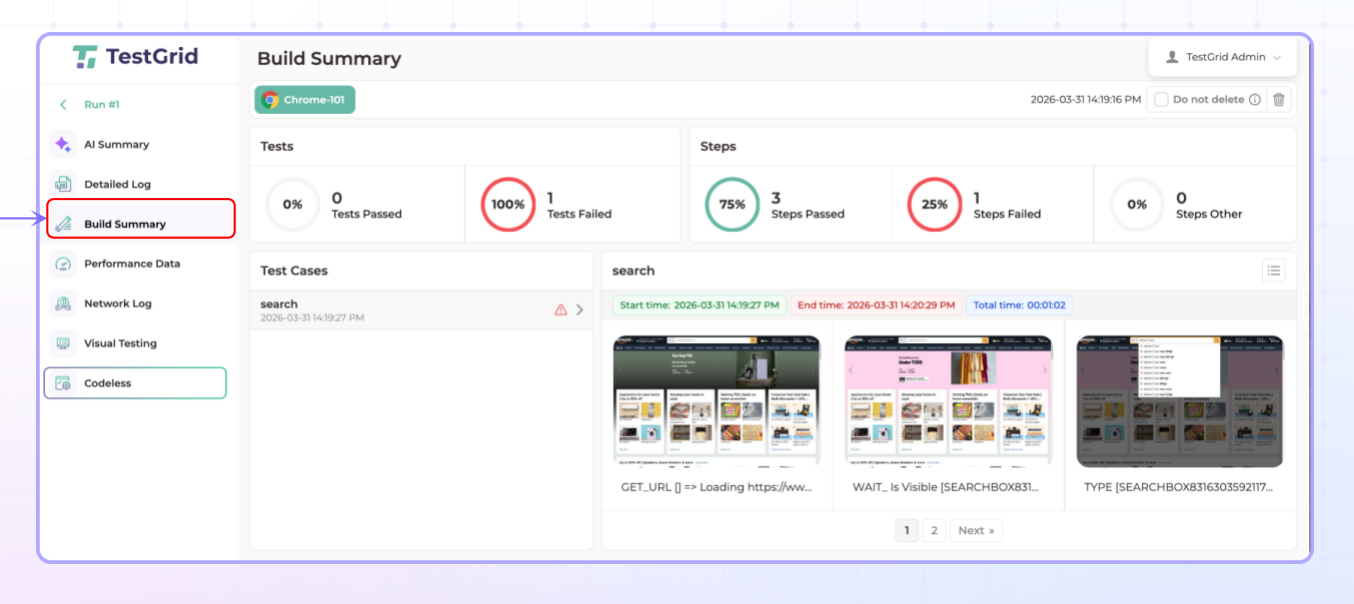
Step 17: Review Build Summary
Open Build Summary to view overall execution statistics and results.
Outcome
You have successfully created a CoTester project, generated AI-powered test cases, debugged and executed them, and reviewed the execution results, logs, AI insights, and build summary.
Was this article helpful?
That’s Great!
Thank you for your feedback
Sorry! We couldn't be helpful
Thank you for your feedback
Feedback sent
We appreciate your effort and will try to fix the article