Overview
This guide explains how administrators can enable or disable network logging for devices in the TestGrid Device Cloud. Network logs help capture and analyze network traffic generated during test execution, making it easier to troubleshoot application behavior, API calls, and connectivity issues.
Prerequisites
Admin access to the TestGrid portal.
Permission to manage devices.
The target device must be available in the Device Cloud.
Charles Proxy (or the configured network logging tool) must be set up on the device if network logs are required.
Steps
Step 1: Log in to the TestGrid Portal
Sign in to the TestGrid portal using your administrator credentials.
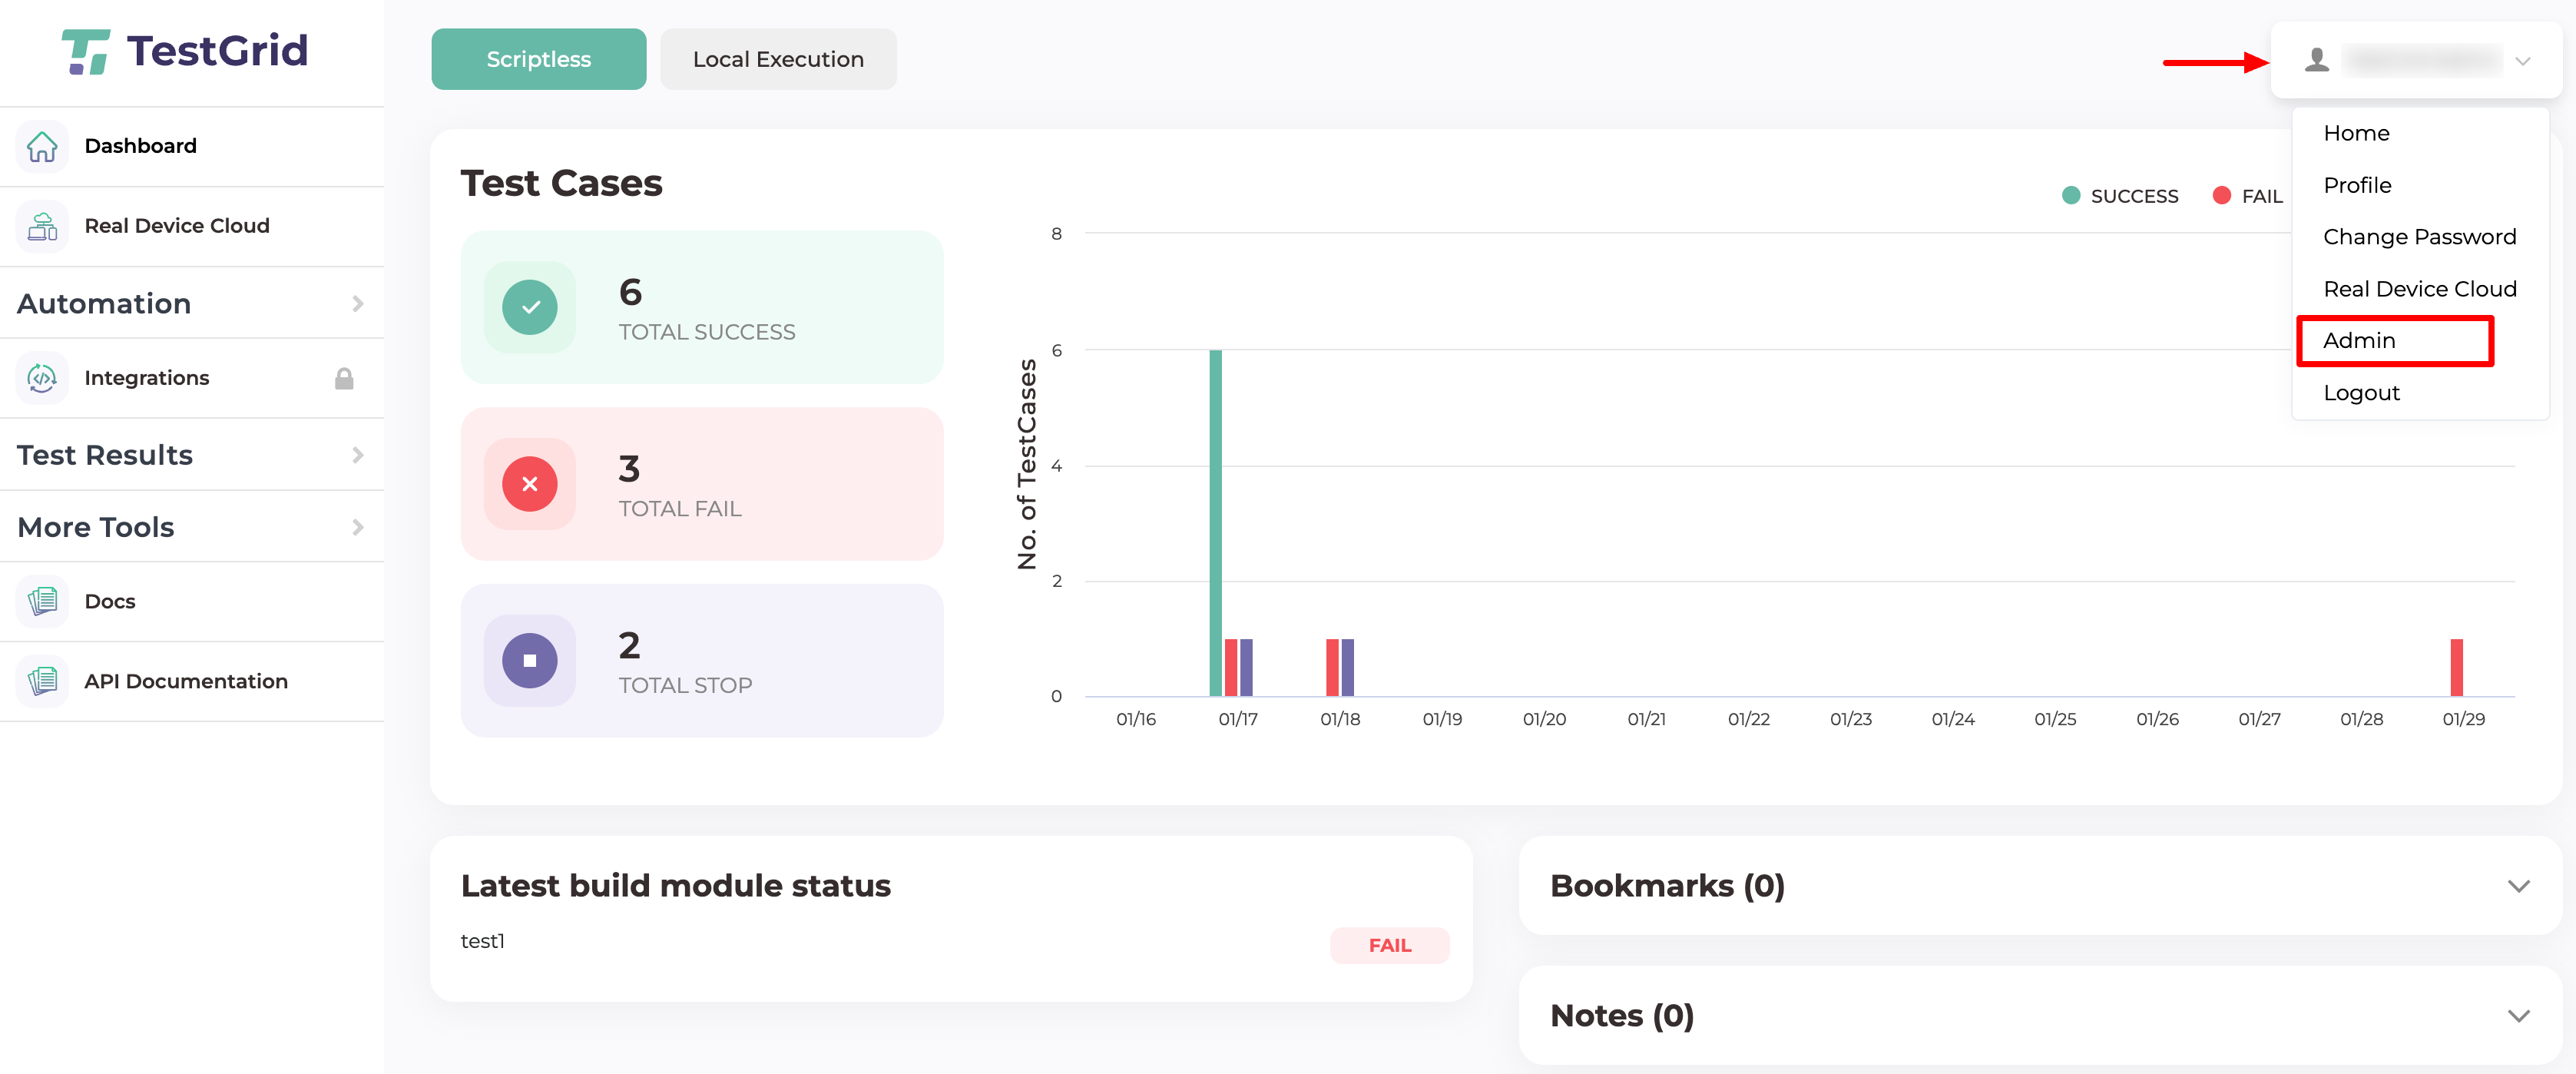
Step 2: Open the Admin Panel
Click your profile icon and select Admin from the dropdown menu.
Step 3: Navigate to Devices
From the left navigation menu, select Devices.
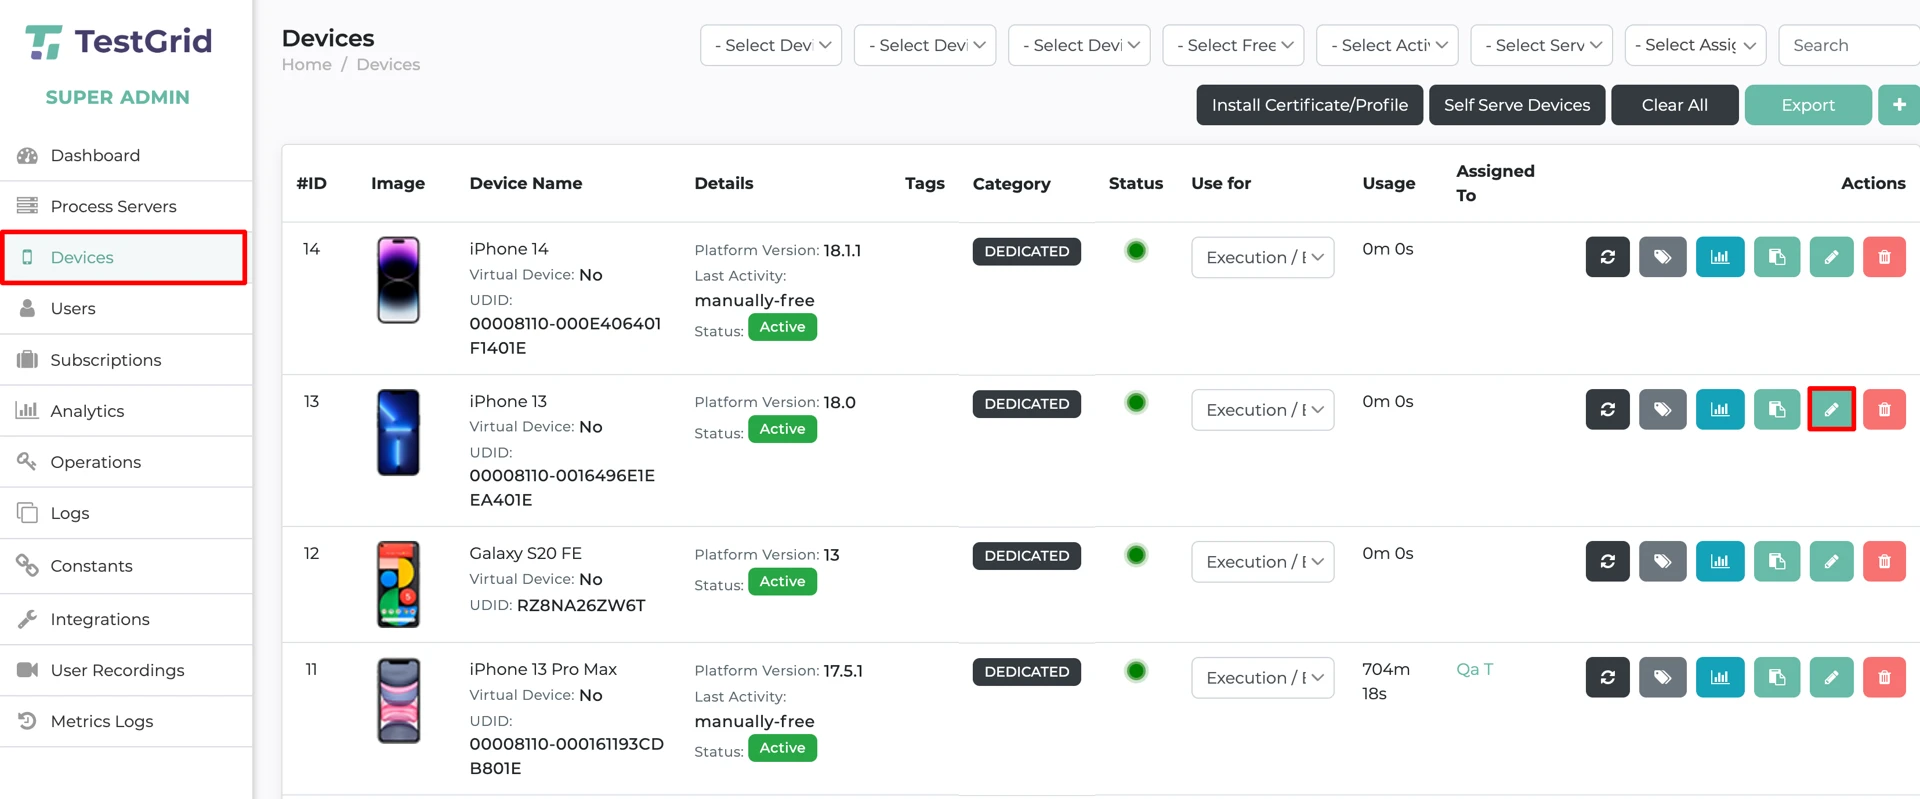
Step 4: Select the Device
Locate the device for which you want to enable or disable network logging.
Click the Edit icon corresponding to the device.
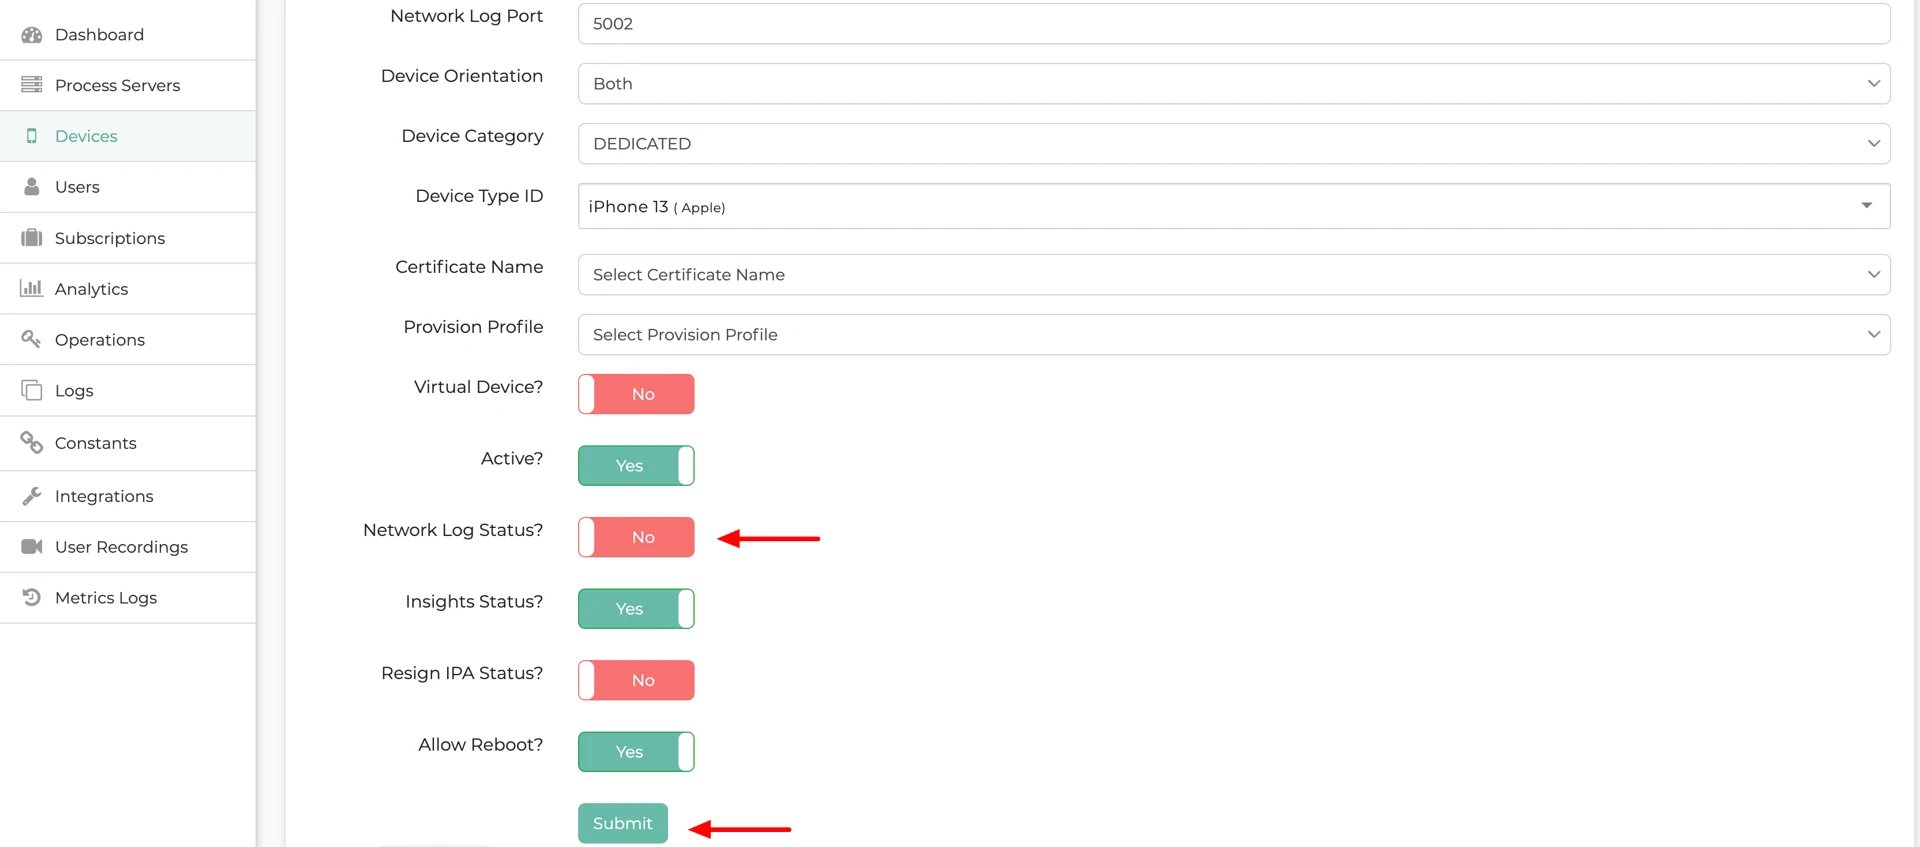
Step 5: Configure Network Logging
Within the device settings:
Locate the Network Log toggle.
Enable the toggle to capture network logs.
Disable the toggle to stop network log collection.
Additional Notes
Enabling network logs may help diagnose API failures, application errors, and network-related issues during test execution.
If networking logs are not enabled after the above steps please contact the TestGrid Support Team.
Outcome
Network logging is successfully enabled or disabled for the selected device. When enabled and properly configured, network traffic generated during test execution will be captured and available for analysis.
Was this article helpful?
That’s Great!
Thank you for your feedback
Sorry! We couldn't be helpful
Thank you for your feedback
Feedback sent
We appreciate your effort and will try to fix the article